file upload using JavaScript: HTML/CSS UI Guide.
If you are new to web development and want to learn how to implement file upload using JavaScript, then this article is for you. In this complete guide, we will build a modern file transfer UI and add functionality that allows users to upload both single and multiple files using plain JavaScript.
The good news is that you don’t need any external libraries. By the end of this tutorial, you will know:
- How to create a file upload form with JavaScript.
- How to preview files before uploading.
- How to handle multiple file upload using JavaScript.
With file upload using JavaScript, you can easily let users send documents and images online.
Developers often need file upload using JavaScript for forms and file-sharing tools.
A project on file upload using JavaScript will help you understand client-side file handling.
Watch the Video Tutorial: file upload using JavaScript
Why Do We Need File Upload Functionality?
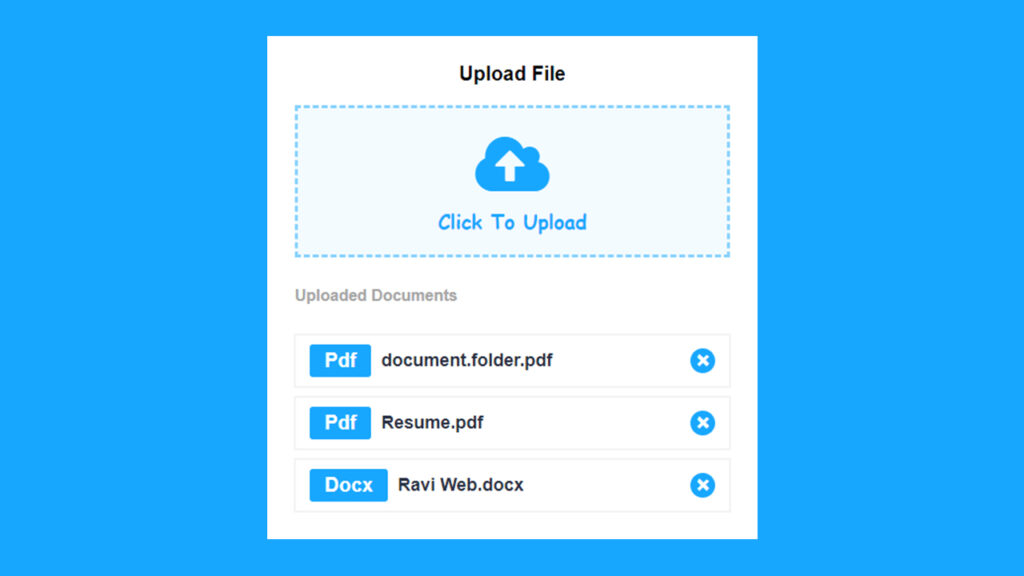
File upload is an essential part of many web applications. Without it, users cannot submit assignments, upload reports, or share documents. Some common examples include:
- Students uploading homework in PDF format.
- Job seekers submitting resumes as DOCX.
- Employees sending weekly reports.
- Designers sharing documents with clients.
That’s why knowing file upload using JavaScript is a must for web developers.
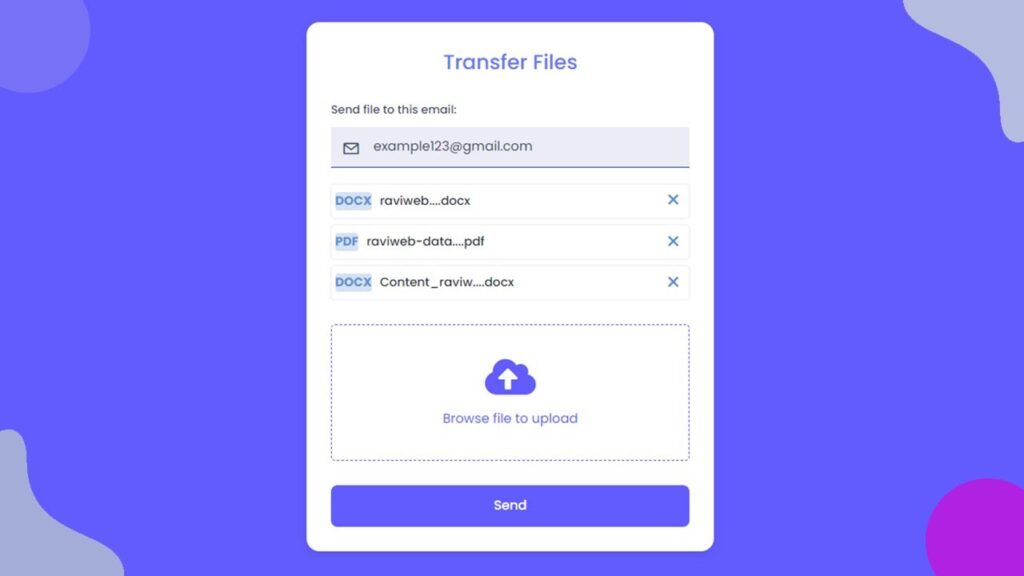
Project Overview
We are going to create a file transfer form where:
- The user enters an email address.
- Selects one or more files to upload.
- Uploaded files appear in a preview box.
- Files can be removed before sending.
- Finally, the user clicks a Send button.
HTML Code:
<!DOCTYPE html>
<html lang="en">
<head>
<meta charset="UTF-8">
<meta http-equiv="X-UA-Compatible" content="IE=edge">
<meta name="viewport" content="width=device-width, initial-scale=1.0">
<title>Transfer Files With Upload Files Client-Side Using HTML CSS & JavaScript || Ravi Web</title>
<!-- ============Font Awesome CDN===== -->
<link rel="stylesheet" href="https://cdnjs.cloudflare.com/ajax/libs/font-awesome/5.15.3/css/all.min.css" />
<!-- ============CSS Link========= -->
<link rel="stylesheet" href="style.css">
</head>
<body>
<div class="file-transfer">
<div class="container">
<div class="title-section">
<h2 class="title">Transfer Files</h2>
</div>
<form action="" class="form">
<div class="input-group">
<label class="label-title">Send file to this email:</label>
<input type="email" placeholder="example123@gmail.com" autocomplete="off">
<span class="icon">✉</span>
</div>
<div id="filewrapper">
<!-- <div class="showfilebox">
<div class="left">
<span class="filetype">Pdf</span>
<h3>raviweb.pdf</h3>
</div>
<div class="right">
<span>×</span>
</div>
</div> -->
</div>
<div class="upload-file">
<input type="file" class="file-input" accept=".doc,.docx,.pdf" hidden multiple>
<label for="file">
<i class="fas fa-cloud-upload-alt"></i>
<p><span>Browse file to upload</span></p>
</label>
</div>
<div class="input-group">
<button class="submit-btn" type="submit">Send</button>
</div>
</form>
</div>
</div>
<!-- =========JavaScript Link========= -->
<script src="script.js"></script>
</body>
</html>This creates the base form with email and file input fields.
CSS Code:
Let’s add some CSS to style our file upload form.
/* ==========Poppins Font ========== */
@import url('https://fonts.googleapis.com/css2?family=Poppins:wght@400;500;600;700;800;900&display=swap');

* {
  margin: 0;
  padding: 0;
  box-sizing: border-box;
  font-family: 'Poppins', sans-serif;
}

.file-transfer {
  background-color: #625BFE;
  width: 100%;
  min-height: 100vh;
  padding: 10px;
  display: flex;
  justify-content: center;
  align-items: center;
}

.file-transfer .container {
  max-width: 500px;
  width: 100%;
  background: #fff;
  padding: 30px;
  border-radius: 16px;
  box-shadow: #00000014 0px 4px 12px;
}

.file-transfer .title-section {
  margin-bottom: 30px;
}

.file-transfer .title-section .title {
  color: #6676f7;
  font-size: 25px;
  font-weight: 500;
  margin-bottom: 10px;
  text-transform: capitalize;
  text-align: center;
}

.file-transfer .input-group {
  position: relative;
}

.file-transfer .input-group .label-title {
  color: #38475a;
  margin-bottom: 11px;
  font-size: 14px;
  font-weight: 500;
  display: block;
}

.file-transfer .input-group input {
  color: #38475a;
  background: #3848a51a;
  height: 50px;
  width: 100%;
  font-size: 16px;
  font-weight: 300;
  padding: 9px 18px 9px 52px;
  border: none;
  border-bottom: 1px solid #3648a5;
  outline: none;
  margin-bottom: 20px;
}

.file-transfer .input-group input::placeholder {
  color: #38475a;
  font-size: 16px;
  font-weight: 400;
}

.file-transfer .input-group .icon {
  position: absolute;
  left: 13px;
  top: calc(50% - 11px);
  color: #38475a;
  font-size: 23px;
  text-align: center;
}

.file-transfer .showfilebox {
  display: flex;
  align-items: center;
  justify-content: space-between;
  box-shadow: #0000000d 0px 0px 0px 1px, #d1d5db3d 0px 0px 0px 1px inset;
  padding: 5px;
  border-radius: 5px;
  margin-bottom: 8px;
}

.file-transfer .showfilebox.hide {
  display: none;
  transition: all 0.5s;
}

.file-transfer .showfilebox .left {
  display: flex;
  align-items: center;
  flex-wrap: wrap;
  gap: 10px;
}

.file-transfer .showfilebox .left .filetype {
  background: #5a90d442;
  color: #5b8fd3;
  font-size: 15px;
  font-weight: 700;
  text-transform: uppercase;
  border-radius: 3px;
}

.file-transfer .showfilebox .left h3 {
  font-size: 15px;
  font-weight: 500;
  color: #292F42;
}

.file-transfer .showfilebox .right span {
  display: inline-block;
  color: #608fd3;
  line-height: 30px;
  width: 30px;
  height: 30px;
  text-align: center;
  cursor: pointer;
  font-size: 30px;
  border-radius: 10px;
}

.file-transfer .showfilebox .right span:hover {
  color: #7771f7;
}

.file-transfer .upload-file label {
  height: 167px;
  display: flex;
  cursor: pointer;
  margin: 30px 0;
  align-items: center;
  flex-direction: column;
  border: 2px dashed #625BFE;
  border-radius: 5px;
  justify-content: center;
}

.file-transfer .upload-file i {
  font-size: 50px;
  color: #625BFE;
}

.file-transfer .upload-file p {
  margin-top: 15px;
  font-size: 16px;
  text-align: center;
  color: #625BFE;
}

.submit-btn {
  width: 100%;
  background: #625BFE;
  border: 1px solid transparent;
  border-radius: 8px;
  font-size: 16px;
  color: #fff;
  padding: 13px 24px;
  font-weight: 500;
  text-align: center;
  text-transform: capitalize;
  cursor: pointer;
  transition: all 0.4s;
}

.submit-btn:hover {
  background: #7771f7;
  border: 1px solid #7771f7;
}
Now our file upload form looks neat and professional.
JavaScript Code:
const fileInput=document.querySelector(".file-input");
const filewrapper=document.getElementById("filewrapper");
const uploadfile=document.querySelector(".upload-file");
uploadfile.addEventListener("click",()=>{
fileInput.click();
});
fileInput.onchange=({target})=>{
let file=target.files[0];
if(file){
let fileName =file.name;
let filetype = fileName.split(".")[1];
if(fileName.length >=12){
let splitName = fileName.split(".");
fileName = splitName[0].substring(0, 13) + "...." + splitName[1]
}
fileshow(fileName, filetype);
}
}
const fileshow = (fileName, filetype) =>{
filewrapper.innerHTML +=`<div class="showfilebox">
<div class="left">
<span class="filetype">${filetype}</span>
<h3>${fileName}</h3>
</div>
<div class="right">
<span>×</span>
</div>
</div>`;
const crossElem = document.querySelectorAll(".right");
const showfileboxEle = document.querySelectorAll(".showfilebox");
for(let x =0; x < crossElem.length; x++){
crossElem[x].addEventListener("click", ()=>{
showfileboxEle[x].classList.add("hide");
})
}
}
This code does the following:
- Opens the file dialog when the upload section is clicked.
- Shows a preview of the uploaded file.
- Allows the user to remove files before submission.
Best Practices for File Upload
- File Type Restriction – Only allow safe file formats (PDF, DOC, DOCX, PNG, etc.).
- File Size Limit – Set a maximum file size limit to prevent server overload.
- Validation – Always validate both on the frontend and backend.
- Security – Store files in a secure location, never allow direct execution.
- Progress Bar – For better UX, consider adding a progress bar.
Related JavaScript Examples
- JavaScript Form Validation Example
- Drag and Drop File Upload in JavaScript
- Password Strength Validation in JavaScript
Conclusion
We just built a complete project on file upload using JavaScript.
What we learned:
- Creating a styled upload form with HTML and CSS.
- Adding JavaScript to show file previews.
- Implementing multiple file upload using JavaScript.
With these concepts, you can now add file upload functionality to your websites and projects easily.